Video Case Studies
May 17, 2011 12:31 PM,
By Don Kreski
How to best capture your success stories onscreen.
More on Davenport University
Video: Inside the Davenport University Installation
Davenport University Case Study

The hardest part of any production is coming up with the first shot. You need something that establishes what you’re going to talk about and grabs your viewers’ interest.”
Related Links

That’s Wendy Ellis, the videographer I worked with to create a video case history about AV systems installed at Davenport University (DU) in Grand Rapids, Mich. The video is a companion piece to a case study about DU featured online. (Watch the video.) You can watch the video online at svconline.com. This month, I thought it might be helpful for those producing their own video case histories to describe how we created that video.
For the first shot of this production, we settled on the simple statement, “Digital video is extremely complex,” delivered by Senior Engineer Kirk Griffes of BlueWater Technologies. Griffes goes on to describe the reasons why dealing with HDMI-based video can be difficult, and why he used Crestron’s DigitalMedia platform to help him work through its various issues at DU. Next, Davenport IT Manager Brent Bean and CIO Brian Miller describe their goals for the new systems and why an all-digital solution was best.
There are many ways to create an effective video. We might have written a script and had it read by a professional actor or actress, illustrating this narration with video and still images of the Davenport installation. Instead, we interviewed the people most involved in the project, asking them to tell us about it in their own words. In my opinion, that’s the most interesting way to tell a project story and to establish the expertise of an AV integrator.
“The challenge in a video like this,” Ellis explains, “is eliciting evocative statements from the people you interview, and then, once you have those statements recorded, assembling the best of them in a logical, compelling order. The opening statement sets the tone for the whole video, so you need to choose from the best of your material carefully and build your edits from there.”
Let’s look in a little more in-depth at how we created the Davenport video.
Preparing and Shooting
“It’s really a good idea to get to know the people you will interview as much as possible before you put them in front of a camera,” Ellis says. “They need to know that this will be a friendly conversation, captured by a camera and microphone. We’re not there to grill them. If they stutter or make a mistake, that’s OK. It’s easy to delete that. I always explain that I don’t know what they know and I’m there to learn. If I fail to ask a question that should be asked, they can jump in and say, ‘Wait a minute, we should talk about this.’”
This particular project was easier than most in some ways. We did not begin taping until after I had completed the interviews that went into the print article, and so there was no mystery about what we were going to talk about. Nonetheless, Ellis spent quite a bit of time warming up the people we would interview while the cameraman, Cody Meincke, and I set up. Ellis has a very nice way of dealing with people, and she quickly put everyone at ease.
“It’s important to work with a good team on a project like this,” Ellis says. She and I wrote the interview questions together, and while she took charge when the camera was rolling, I jumped in from time to time to ask our subjects to elaborate on details of the installation or the technology. “It’s important to realize that, while we walked in with a set of questions, we didn’t always stick to them,” Ellis explains. “You never know what people are going to say. If you approach each interview as a conversation, they will say things you never expected that are far more interesting than anything you could have planned.”
We shot the piece in high definition, 1080p, although we realized it would probably appear online at a lower resolution. “You want the quality to be good,” Ellis says. “HD is exacting. You need to know lighting, your camera, and how to use your microphone. Cody was there for that. Don kept track of the content, and he was especially concerned that we covered the technical side of the Davenport project.
“I was there to make sure the content was good. A video is a series of sound bites, so I was listening to the way people said certain things. I might be thinking, ‘There’s a good one,’ or ‘Oh, that didn’t quite come off. Let’s ask that question again.’ I was also making mental notes: ‘We need to get a shot of this or that’ because Kirk mentioned it.”
One of the things we both listened for was a lead statement, a sound bite we could use to start out the final video. “You don’t always get it on the first attempt. If you don’t, you formulate another question that’s very pointed, hoping to get your subject to say what you want him to say. If that still doesn’t work, you might need to find someone else to interview.” For that reason, it’s easier and safer to line up more than one client or staff member to interview. It’s hard to predict who will look and sound the best on camera.
Video Case Studies
May 17, 2011 12:31 PM,
By Don Kreski
How to best capture your success stories onscreen.
More on Davenport University
Video: Inside the Davenport University Installation
Davenport University Case Study
Editing and B-roll
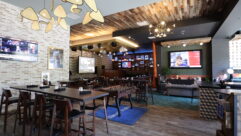
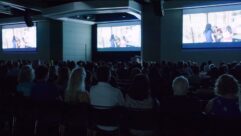
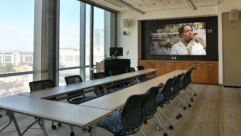
Because talking heads by themselves can be boring, Meincke and Ellis shot extra video of the Davenport boardroom, auditorium, and classrooms, while I shot still pictures. DU’s Ignacio Perez and Rick Jensen were extremely generous in finding or shooting additional stills, and I also collected images from Crestron and BlueWater. Ellis used all of this as cover video or B-roll, adding it over the edited interviews to illustrate what Griffes, Bean, and Miller talked about. “One thing I really like about Apple Final Cut Pro is its ability to import digital stills and then create pans, zooms, and other motion using them,” she explains.
If you do your job properly, you’ll have far more video to work with than you’ll ever use. In this case, we ended with about 60 minutes of interviews and 60 minutes of B-roll, plus 50 still images, which we trimmed all this material down to a little more than four minutes in the final production. An old rule of thumb is that you want at least 10 minutes of raw video for every minute you use. We finished with about a 15:1 ratio on the interviews and a 30:1 ratio overall.
“This may seem like a lot to sort through, and it is, but it’s always better to have more than you need than to not have something you really need,” Ellis explains.
“That first line really was perfect, although it took a while to realize it,” Ellis says. “We started the final video probably five different ways, but I kept feeling it could work better. Still, that’s what video production is all about. The more you put into it, the more you can take away.”


