Coming Home to Windows Home Server Part 33
Nov 1, 2010 10:02 AM,
By Eric B. Rux
Installing Vail and moving your life to the new server.

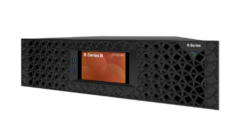
Figure 1. the client for Windows or a Mac can be downloaded and installed. Note that XP is only supported if you are running Service Pack 3. (This shouldn’t be a problem as you should be running SP3 anyway.)
Last month, I introduced Vail and the many features that we’re going to be discussing in this column. This month, let’s start at the beginning of the list with hardware requirements installation and a simple migration.
According to the Getting Started Guide for Windows Home Server Code Name “Vail”, this new version of Home Server has some very specific hardware requirements. Most notably is the absolute requirement of a 64-bit CPU. This by no means is difficult to acquire (NewEgg.com has more than 90 64-bit CPUs for sale, for example). However, this does mean that any kind of in-place upgrade of your OEM V1 Home Server is probably out of the question. Because of this, Microsoft didn’t even bother to provide a direct upgrade path. To make matters worse, there also isn’t an easy way to migrate to Vail; you will have to do it manually.
If this causes you to think twice about Vail, don’t. It really isn’t that bad. I’ll walk you through it. (If you purchased or plan to purchase an OEM Vail server, you can skip the installation section below.)
Related Links

Coming Home to Windows Home Server Series
Welcome Home! In this series, Eric B. Rux—Windows Home Server MVP—breaks down the Windows Home Server (WHS) with useful tips, new add-ins, problems solvers, and the latest news. …
Installation
First, start with the right hardware. At a minimum, you will need a 1.4GHzx64 processor, 1GB RAM, and at least one 160GB (or larger) hard drive. Note that these are minimums—not the recommended hardware. Consider using two or more very big hard drives (500GB or larger) to utilize folder duplication and protect your data from a disk failure.
The setup itself is very similar to a Windows Vista/7 or Windows Server 2008 installation. I did notice that the setup will fail if a network connection is not detected. The reason appears to be because the installation downloads and installs updates during the installation. In addition, it is very important that you do not name the new Vail Home Server the same name as your old V1 Home Server (you can never have two computers on a network with the exact same name). Therefore, having the network cable plugged in during the installation lets the setup routine verify that the name you choose is unique.
The installation can take an hour, depending on your specific hardware. As soon as it is complete, you’re ready to start migrating from your old Home Server to the new one.
Clients
As with version 1 of Home Server, each client computer (XP, Vista, Windows 7, etc.) will need to have a client installed so that they can communicate with the Home Server. This enables the Home Server to backup each client computer, and it provides for easy remote access. Unlike version 1, the setup is much easier. Instead of trying to find the CDs that came with your Home Server or remembering the \servershare path of the installation files, simply point your browser to http:///Connect.
As Figure 1 shows, the client for Windows or a Mac can be downloaded and installed. Note that XP is only supported if you are running Service Pack 3. (This shouldn’t be a problem as you should be running SP3 anyway.)
The installation can take quite a while if .NET 4.0 has to be installed, and your computer will restart a couple of times, so be patient.
Migration
As I mentioned earlier, there isn’t a direct upgrade or migration path to Vail. There is hope that a third-party may come up with a migration utility, but until then, you’re on your own to do it manually.
For this step, I recommend that you log on to the server console. Use Remote Desktop, or log onto the server directly if it has a keyboard/monitor/mouse. Be very careful and never make any changes unless you know exactly what you are doing. Most of the time, you should use the dashboard to perform administrative tasks, but this is an exception to the rule (my exception, not Microsoft’s).
To copy the files from your old Home Server to the new Vail Home Server, navigate the network to find the old server. For me, the easiest way to do this is to press the Windows Key (near the space bar) and the ‘R’ key at the same time to bring up the Run Command. Enter in \OldHomeServerName and click OK. Start with Music, and copy all of the folders to the new Home Server. Depending on how many albums you have, this could take minutes, hours, or if you have teenagers, even days.
Coming Home to Windows Home Server Part 33
Nov 1, 2010 10:02 AM,
By Eric B. Rux
Installing Vail and moving your life to the new server.
Remote Access
The next step is to enable Remote Access. From the Home Server Dashboard, click on Server settings, then Remote Web Access. Clicking on “Turn on” starts a wizard that walks you through steps of setting up your router and domain name.
Setting up the router for your Home Server has always been wrought with trouble; either it works, or it doesn’t—and it was difficult for the average home user to figure out why. Microsoft has done a good job of improving the wizard that sets up Remote Access with each Power Pack, so I was surprised when the wizard in Vail failed to setup my router. A little troubleshooting on my part found the culprits: 1) I have two routers on my network, and 2) I had manually setup the router for the old Home Server. These two anomalies are simply outside of the wizard’s capabilities. Once I disconnected the second router and removed the static entries in the router, the wizard worked fine. Remember: Home Server is designed to work in a simple home environment. Keep this in mind if you have trouble getting Remote Access to work.
The second part of Remote Access is the Domain Name. If you had Remote Access setup with your old Home Server, you will want to move your Domain Name to the new server. In my case, I used Microsoft’s free “homeserver.com” domain, so I simply entered “MyName.homeserver.com” into the wizard. After logging onto Windows Live, the Remote Access wizard moved my domain name over to the new server.
A new feature of Remote Access is the ability to customize your home page. You can change the logo and the background image. The logo should be 32×32 pixels, while the background image should be close to 800×500 pixels. Images can be in bitmap, GIF, PNG, or JPG format.
Just Getting Started
I had a good time setting up my new Vail Home Server and migrating the data from the old server. While Vail is totally new, it resembles enough of the old Home Server to make navigation easy. I stumbled on some more new features that I missed before, and I’m looking forward to digging into those as well.
The migration wasn’t too difficult, but logging onto the console concerns me. If you have questions or comments, please email me and we’ll try to walk through it together. I’m going to see if I can find a better solution that will make it easier for the average home user.
Have fun with your new Vail server!
Eric B. Rux is a contributing editor for Windows IT Pro, and he writes a monthly column for Residential AV Presents Connected Home. Rux is the manager of Technical Support Services for Eastern Washington University and teaches the Microsoft Certified IT Professional (MCITP) certification program at a technical college.