Planning and Designing: your video room
Feb 1, 1998 12:00 PM,
Bob Heil
Little can compare to the feeling of attending a live event, and it isagreed that a similar feeling can be recaptured by projecting video imagesonto a large screen and reproducing the audio through a multi-channel Dolbysound system. By assembling the right equipment and installing it in thecorrect space, one can have an impressive home-theater system.
There is one seldon-heard rule in all electronics: The more you spend, thebetter it sounds or looks. Ego has done a lot to ruin many potentiallywonderful media rooms. And so we trundle through the piles of rumors,rubbish and myths to create an affordable home system.
Choose the best space. Room dimensions are crucial for good soundreproduction. It is always better to have a rectangular room with anapproximate height, width and length ratio of 1.0:1.6:2.5. Since most homeshave an 8 foot (2.4 m) ceiling, an appropriate media room would be139x209(4 mx6.1 m), and if this is a new construction, then walls shouldnot be parallel. They should be slanted by several degrees to help reducethe standing waves.
Sound does not emit from the front wall to the back and stop. It reflects90 degrees off the back wall and hits the floor, ceiling and side wallssimultaneously, creating numerous reflective sound patterns. Because soundtravels at 1,120 feet/sec (341 m/sec), it can create some pretty meanphase, resulting in slight echoes and hollow-sounding audio. The fix issimple. Kick the top of the wall in about 3 inches (7.6 cm) or 4 inches(10.2 cm). Curve the ceiling a bit. Ever notice a high-dollar recordingstudio? None of the walls are ever parallel. They are designed deliberatelyto help reduce the standing waves.
With the space defined, the major equipment decision will be the type andsize of the video image. The easiest and least expensive will be arear-projection television. The caveat here is that many of these do notexhibit pristine video images. Bigger and more expensive is not always thebest.
The alternative is a front-projection unit. In the past decades, thethree-gun analog projectors were quite well accepted; however, there is aterrific breakthrough giving us LCD (liquid crystal display) projectorsthat are simply terrific. They are lighter, need very little service (nolens convergence) and are very inexpensive (starting below $3,000), allproducing video images on screen sizes up to 15 feet (4.6 m).
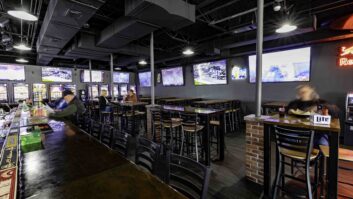
Be aware that front-projection systems are not usable in high ambientlight. If you have lots of windows in the media room, some method ofmotorized drapes or blinds will be needed to darken the room during theday. If this will be a multi-purpose room, it would be advisable to lookinto the 50 inch (127 cm) or 60 inch (152 cm) Elite rear-projectiontelevision monitor instead of a projector and screen. With either type, itis best to dedicate one wall for the screen and front line of loudspeakers.Some prefer to have just the screen and loudspeakers without distraction.
An interesting approach to the design of the room is to place the projectorbehind the screen. The throw distance of usually about 12 feet (3.7 m) isstill needed, but using a special membrane-type screen through which imagescan be projected can allow the projector to be moved out of sight, whichcan give the designer tremendous latitude, help cut down on ambient lightrefraction and provide a stunning, bright image.
We are dealing with science here, but so many of the systems seen todayjust seem to forget that. Loudspeaker placement is crucial to the faithfulreproduction of the dialog sound, the music and the special effects.
Front left and right loudspeakers should be at ear level when seated and nohigher. Anything less than 6 feet (1.8 m) between these two will not give awide enough front spread; 10 feet (3 m) or greater loses the whole frontimage
The ideal subwoofer setup is to use two of them – one under the left andone under the right front loudspeakers. The subwoofer must be self-poweredwith a parametric crossover so you can change the parameters for each roomin which it operates. The frequency, roll-off and level are essential forproper subwoofers. If it doesn’t have a built-in power amplifier, however,walk away from it.
If we could devote this entire month’s issue to surround sound, then weprobably would still have things to learn about surround loudspeakers.Surrounds are intended to surround you with ambiance. You will not hear aflute in the right, guitar in the left front, dialog in the center andpiano in the rear. Ray Dolby’s wonderful Pro Logic technology is not theold QUAD system. It is truly a surround-effect channel, and it is becauseof this that we must pay close attention to its placement.
The ideal is to use dipole loudspeakers so that we actually receivesurround information from the reflections off the screen and rear wall. Thebest placement for in-wall or simple on-the-wall loudspeakers is to placethem on the side walls 2 feet (0.6 m) to 3 feet (0.9 m) behind thelisteners’ ears.
One last item about surrounds. It has always been an industry thought thatbecause Mr. Dolby only gives us 100 Hz to 7 kHz in these effect rearchannels, there is no low-end response. Well, if you really want to enhancea home-theater system, place a dedicated powered subwoofer behind youconnected to these rear surrounds. There is lots of low-end response backthere, enough that at the small expense of $450 to $600 for somewonderfully powered subs, it is a must for your room.
Last, but certainly the most important, is the equipment itself. The idealthing to do is mount it into a 19 inch (48.3 cm) rack. This can be placedright into the wall or into a properly sized hole of your customentertainment center. It is the 70-year-old technology of the telephoneindustry that allows us to wire, test and align all the gear and simplyslide it into place. The location is your call. If you like to see theflashing LED, then put it to either side of the screen. Placing it behindyou will mean installing some IR repeaters so that you can point the remoteto the screen and send that signal to the equipment behind you. Once all ofthe hammers are at rest and the paint and glue are dry, we only have toconnect the wire and enjoy.
One small note about that wire. Another of the industry rumors is, thebigger the better. A Julian Hirsch review of 1994 said it best: “The effectof the huge wires is normally only a minute change in frequency response,hardly a matter to be concerned about unless you are the type who agonizesabout how many angels can dance on the head of a pin.” After severalthousand audio systems designed and installed, I still use AWG #16 wire,but I prefer the large lamp cord for runs under 50 feet (15 m). In mostmedia rooms, such a distance is seldom reached.