You should solder all connectors, right? No, not necessarily. It is oftenbetter to use a mechanical connection only. Think of the cold solder jointsyou have seen in the past and how you wished that they had been crimpedinstead. Many crimped or mechanical connections have been operating foryears without any problems. Many telephone connections around the world,for example, have never failed, and they are all mechanical connections.
Like any connection, however, mechanical connections must be madecorrectly. We have all cursed mechanical connections one time or anothernot because mechanical connections are not reliable, but because they weremade incorrectly. Never use diagonal pliers, lineman’s pliers or a hammerto assemble crimped connectors. It is important that the proper tool alwaysbe used to make the connection.
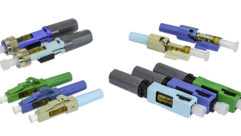
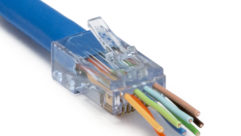
Crimped connectors or lugs are used for stranded and solid wire, coaxialcable, telephone wire and cable, D-Subminiature connectors and IDC flatwire, to name a few. They come in various sizes, shapes and characteristics(see Figure 1). The connector end may be a ring, spade, flanged spade orsplice. All things being equal, the ring end is the most reliable becauseeven if the screw loosens, the connector will not fall off. If you preferto use a spade-type lug, which is much easier and faster to install, Iwould use the flanged spade type because if the screw loosens, theconnector will probably not fall off.
Incidentally, insulated connectors are color coded on the wire end of theconnector for the various size wire. The color codes are: wire size AWG#22to AWG#18 is red; AWG#16 to AWG#14 is blue; AWG#12 to AWG#10 is yellow, andAWG#12 to AWG#10 is yellow large bell (white). AWG is the acronym forAmerican Wire Gage. Non-insulated crimped connectors are used for wiresizes ranging from AWG#8 to AWG#2 and 1/0 to 4/0.
The most important thing is that you use the proper tool to crimp the lug.
Probably the most recognized crimp connectors or lugs are T&B (Thomas andBetts), AMP and Stakon. They all sell tools for crimping as do many othertool manufacturers. Some tools are made for only insulated connectors;others can be used for both insulated and non-insulated ones. Again, alwaysuse the proper tool; do not think that a cheap tool will properly crimp aconnector.
Crimped insulated lugs work best with non-tinned stranded wire. When usingsolid wire, it is important to solder the connection after crimping becausethe crimp does not fill the empty space as well, so even if the crimp iswell made, the wire can move and rotate, causing a poor connection. It isalso better to solder stranded wire that you have tinned after it has beencrimped for the same reason. If you use non-insulated lugs for AWG#22 toAWG#10 solid wire, and they are crimped with an AMP type W tool, the wiredoes not have to be soldered to the lug.
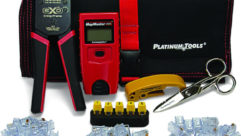
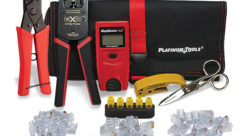
There are many kinds of crimping tools. Probably the most common tool forwire is the AMP Super Champ or equivalent. This is a simple hand devicewhere you place the connector in the tool and squeeze the handles untilthey touch each other. If the connector is not in the proper die space, itis possible to close the tool without completely squeezing the connectoraround the wire. Always be sure that the connector is in the die for thecolor connector you are using, or if you are using a non-insulatedconnector, be sure the connector is in the small die marked non-insulated.This tool can also be used to strip the wire and to cut bolts. The SuperChamp IV, although it does not cut bolts, strips and crimps moreaggressively.
Although the Super Champ is adequate for most jobs, if you plan to crimpmany connectors and you do not want any call backs, I recommend youpurchase a professional crimper. These tools have a die for each connectorsize so you can be sure the crimp will be made in the proper die. The toolhas ratchet closing, which does not allow you to release the tool until thecrimp is completed, producing a more accurate and repetitive crimp.Remember, a minute saved is a dollar earned.
A good crimp always starts with the first step; preparing the wire. Whenusing an insulated lug, strip off the insulation of the barrel and insertit into the barrel up to the insulation. If you have the correct lug forthe wire size, the insulation will not slide into the barrel. The free endof the wire should be no less than flush with the far end of the barrel andshould not extend more than 1/16 inch (1.6 mm) past the barrel.
It is also important to align the tool with the connector. The crimp shouldbe made on the exact top of the lug, which is where the metal rolls overand touches. Also, crimp on the metal part of the barrel. All too often thecrimp is made on the insulation rather than on the metal part. Although thejoint may look good, the joint is electrically poor and, as a matter offact, so is the mechanical strength. Always follow the directions that camewith your tool. They will tell you where to place the lug and how manycrimps are required (usually one).
If you plan to use the connector in a humid or damp area, you may want tocover it with liquid tape after crimping to keep the moisture fromcorroding the joint or use crimp and seal connectors. These connectors comewith a heat-shrinkable covering that, when heat shrunk, seals the wire tothe connector.
Always lead the wires properly. When connecting to a device, do not run thecable haphazardly. Align the cable with the device and neatly dress thewire over the device and to the connector rather than fanning it out andreturning it to the connector sloppily.
When connecting the lug to a terminal, be sure to use a washer, preferablya locking washer, between the lug and the screw head so that the lug willnot turn while you tighten the bolt and the connection will not loosen dueto vibration. The same rules that apply to wire connectors also apply toall connectors-prepare the wire, use the right tool, do not hurry and usecare.
When crimping cable connectors, cut the cable properly. Always cut the endof the center conductor, the insulation, the shield and the outer jacketsquare and to the correct length as specified by the connectormanufacturer. If you do it correctly, the insulation will hit the barrel ofthe connector when the center conductor is inset the correct distance. Theouter jacket will butt to the connector at the proper shelf. Be sure toflare the shield so that it will be only on the outside of the flare of theconnector, and be sure there are no wire whiskers. Oh yes, put the crimpring on the cable before putting the cable on the connector. Again, it isbest to take the time to do it right the first time.
So what does this all boil down to? Use the proper size lug for the wire orconnector size for cable. Prepare the wire or cable according to thecrimper tool manufacturer. Use the best crimping tool you can afford. Thedifference between a $125.00 tool and a $25.00 tool is less than twoone-hour call backs at a $60.00/hr labor rate. Remember, have patience andnever hurry.


