Top 10 Projection Screen Selection Tips
Sep 1, 2005 3:03 PM,
By Wendy Long, CTS
- Make sure the screen is large enough to read. Determine the optimum screen size based on room dimensions, planned audience seating size, and arrangement. The rule of thumb is to fit the screen to the audience—not to the projector. Da-Lite recommends that the screen height should be approximately one-sixth the distance from the screen to the last row of seats. This allows text to be read and detail to be seen in the projected image. Ideally, the first row of seats should be approximately two screen heights away.
- Make sure that the screen is the correct aspect ratio for the most commonly used projection device. For instance, a video projector should be in 4:3 or 16:9 modes, depending on its native aspect ratio. The screen should match the aspect ratio that is used most often. This will allow the entire screen-viewing area to be filled by the projected image.
- Once a screen size has been determined, one must consider the throw distance of the projector. The projector must be placed the proper distance away from the screen so that the projected image fills the viewing area of the screen.
- Choose the screen surface that best suits the projection and viewing requirements. If the screen will be used for multiple projection methods, choose the screen surface that meets the requirements of the lesser performing projection method. For example, if using a 1000-lumen projector and a 1500-lumen projector, choose the screen surface for the 1000-lumen projector. For further details on selecting the correct screen surface for your application, please refer to the following link: www.da-lite.com/products/selecting.php.
- A factor in screen selection that is often missed is the amount of extra black material sometimes required to lower the screen viewing area to the proper height. In a typical commercial application, the bottom of the screen viewing area should be placed 3ft. to 4ft. above the floor. Example: If you have a room with a 10ft. ceiling and you are using a screen that has a height of 5ft., you will need 1ft. to 2ft of extra black material at the top of the screen. This will put the screen at the appropriate 3ft. to 4ft. above the floor. Houses of worship and auditoriums are two common applications where the screen viewing area may need to be further from the floor depending on seating arrangements and sight lines.
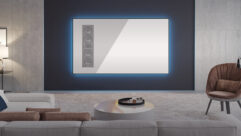
- One important aspect of front-projection screens often minimized or overlooked is black masking borders—more commonly known as screen borders. These are important because perceived brightness of an image on a screen is relative to the light projected on the screen when compared to the surrounding background. For example, if you place a screen against a white wall in a darkened room, the image would likely appear dull and lifeless. However, by incorporating a black border around the screen, the human eye perceives the image to have more contrast and a sharper picture with brighter colors. The eye is comparing the projected image with the black border, not the white background. Borders also help hide flaws in a projected image by masking out unevenness caused by out-of-level equipment, images improperly framed due to focus limitations, or distance from the screen and slight keystoning caused by the projection image not being aligned 90 degrees to the screen.
- When mounting a screen on or near a wall, consideration must be given to items such as marker boards, maps, and pictures that will be placed on the wall behind the screen. Be sure to leave enough clearance behind the screen surface to eliminate the possibility of damage.
- When selecting an in-the-ceiling (ceiling recessed) projection screen, carefully examine the space where the screen will be located to allow for such items as heating ducts, sprinkler pipes, or wiring harnesses that may interfere with screen installation. Review all mechanical prints and conduct a site survey if possible.
- Selecting the proper projection screen control options and accessories for a specific application is essential. All potential control methods (e.g. single or multiple wall switches, wireless remote, serial communication, or any third-party control system) must be taken into consideration in order to allow seamless integration of the screen.
- In front-projection applications, control of ambient light near the projection screen surface will enhance the contrast and brightness of an image being projected. In order to achieve this, place the screen in an area where ambient lighting is low or controllable.
Wendy Long, CTS, is product manager at Da-Lite Screen Company.


