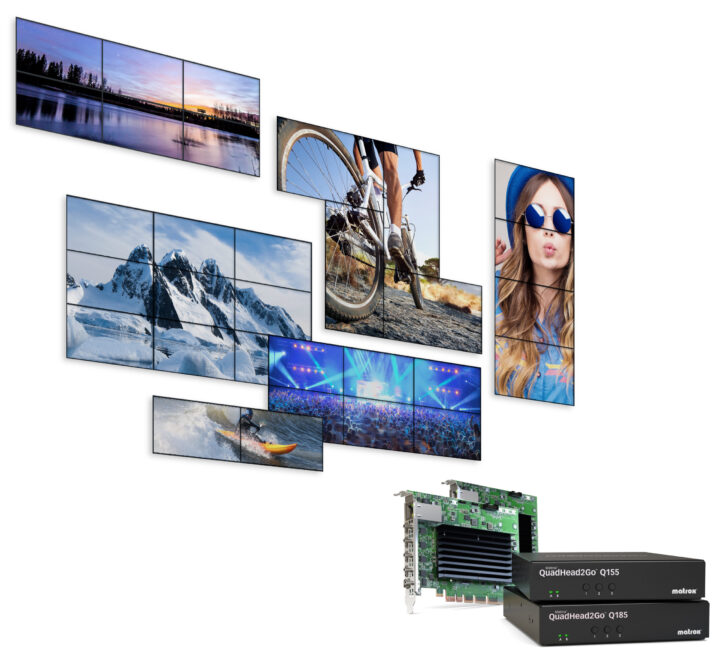
Videowalls are all the rage, getting bigger and more elaborate all the time. Managing and feeding these walls may require expensive processors and many video sources. On the smaller side, though, there is an assortment of options to distribute video across just a few screens. I first encountered the Matrox “2GO” processor series when there was only a dual output model, but the current QuadHead2Go can drive up to four screens in many configurations.
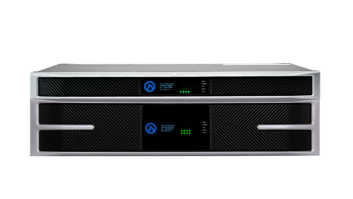
The QuadHead2Go is available as a PCIe card or standalone appliance, with either a single HDMI or DisplayPort input. All models have four HDMI outputs capable of feeding each screen at up to 1920x1200p60, with individual rotation. The single input can map up to 4K/60p video onto those output screens in various aspect ratios.
In a recent application, I used the Q155 appliance to drive three 86” diagonal screens side-by-side in portrait mode, for an overall wall dimension of about 130” wide x 76” high. This wall is meant to be movable, so the screens are on Premier Mounts dual-pole stands with wheels. The Premier RTM rotating tilt mount was used so that screens can be turned to landscape and used individually if desired.
In this setup the wall is fed from a computer in another room, and due to distance we’re using fiber to ensure that video up to 4K/60 will pass without trouble. A shelf attached to the back of the center stand holds the fiber receiver, QuadHead2Go, and power distribution.
With only a single input, the QuadHead2Go is not intended for “windowing” applications where different sources are placed arbitrarily across the wall. But the same effect is possible, with some limitations, by feeding the QuadHead2Go from a computer running suitable graphics or video switching software. In this case, the open-source production application OBS is used to create the complete wall image, including background graphics and live video windows. Multiple video sources feed into the computer and are placed within the OBS canvas.
 The manual provides good info on connections, status lights and buttons, plus basic startup for the (Windows) PowerWall software that’s used to configure the processor. A network connection is required between the QuadHead2Go and configuration computer, but only during configuration. Instruction for the initial network connection is a bit lame–noting only that the QuadHead2Go uses DHCP to get an IP address and will be discoverable by the Firmware Updater. This does work, but what if there is nothing on the network to serve IP addresses (as might be the case in a standalone installation)? I always prefer that equipment comes with a pre-assigned static IP so it’s easy to access from a computer set to the same subnet.
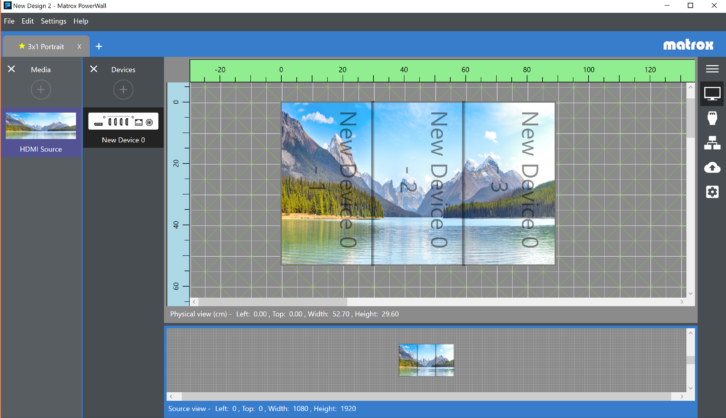
The PowerWall software also discovers the QuadHead2Go (or multiple units), and you have the option to set a static IP once they’re talking. When it launches, PowerWall presents a canvas to position screens. If you’re familiar with wall processors you might immediately try to set up input and output configurations, only to find that nothing works. This is because you must first create a New Design! So I suggest starting with the in-app Help menu (a nice touch). Once a design is opened you can define your output screens, input sources, and other parameters. The software will let you work on a design without a QuadHead2Go connected, which is handy.
Within the Input Management menu (on the right side of the app) there’s a pull-down to select the input source. This can be the live video input (Default) or various images, including Bezel, which puts up an alignment grid for adjusting how video crosses the edges of the screens. Input Management is also where you set the desired input dimensions and frame rate. In the case of three HD screens in portrait, the pixel dimensions are 1080×3 across and 1920 high, so 3240×1920. I was pleased to find that this configuration is relayed back to the source computer and was available as an output monitor size for OBS. I didn’t have to fight with OBS or the PC’s graphics settings.
The Output Management menu is where you define the size and details of your target screens, and how the input maps across them. Other menus keep track of the QuadHead2Go devices in the system, send the configuration to the device, etc. You can also tell the QuadHead2Go to show device info on the screens. This works regardless of the video input settings, so it’s helpful to confirm that the HDMI connections are working.
On the QuadHead2Go appliance itself are three buttons that allow you to select stored layouts or change inputs, using an onscreen display, and toggle the info displays. The buttons can also be used for a factory reset, as detailed in the manual. A secondary Configuration Guide describes parameters for many different multi-screen layouts using one or more QuadHead2Go processors.
For the project mentioned above, building a simple videowall inexpensively was easily done with the QuadHead2Go. And in the future a multi-window processor, rather than a computer, could serve as the “front end” while keeping the QuadHead2Go to drive the screens (possibly saving money on the upstream processor).